For your site to be available to the public, you’ll need to configure your domain…
For your site to be available to the public, you’ll need to configure your domain settings. Specifically, you’ll need to add an A Record to your domain registrar to point to the IP address of your server.
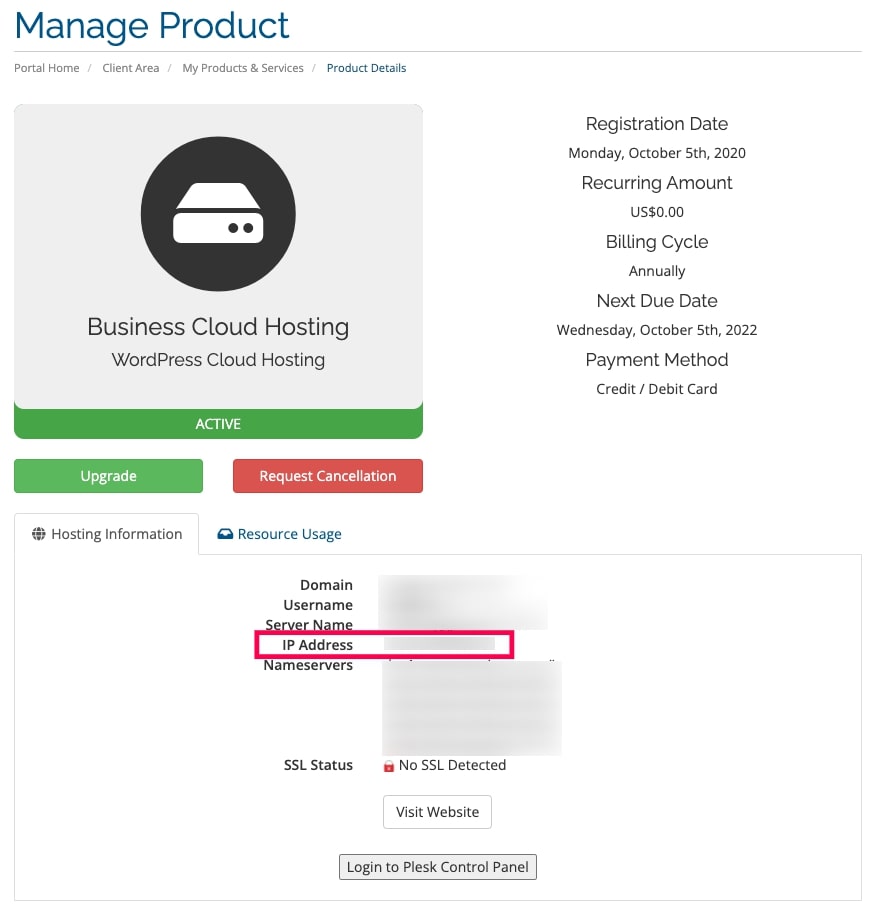
Before you get started, find the IP address for your server, either from the Hosting Welcome Email or log in to your customer account, and check the IP address under Services > Cloud Hosting > Product details.
Then, you’ll need to visit your domain registrar, in this case GoDaddy, and perform the following steps.
- Log in to your Account Manager
- Next to Domains, click Manage.
- Select the domain name you want to use, click Settings and select Manage DNS.
- Click the DNS Zone File tab.
- Click the Edit option to get to the Zone File Editor.
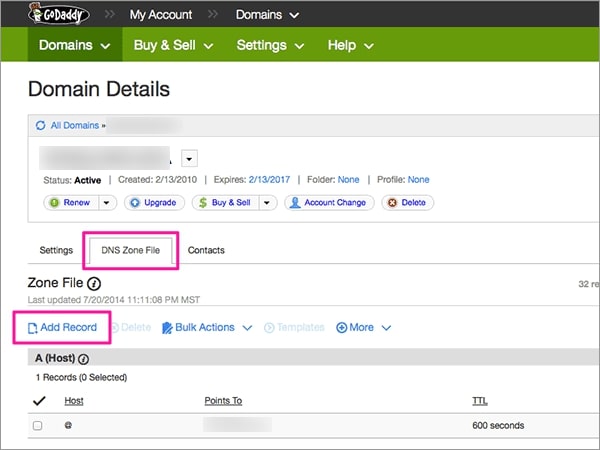

- Click Add Record.
- From the Record type list, select A (Host).
- Complete the following fields:
- Host Name — Enter the host name the A record links to. Type @ to point the record directly to your domain name.
- Points to IP Address — Enter the IP address from your customer account.
- TTL — leave as is.
- Click OK, then click Save Zone File. The new A record displays in the A (Host) section.