Configure your website’s PHP version in Plesk with a few clicks: Log in to your Eggplant…
What you need before you get started?
- A copy of all the files for your WordPress website, if they are archived in a zipped folder it will be easier to upload.
- Export a copy of your database.
- Install WP Migrate DB
- Follow the instructions for the plugin to export your database with the correct domain name
- You’ll need access to your new Plesk account on our cloud hosting.
Upload Your Files
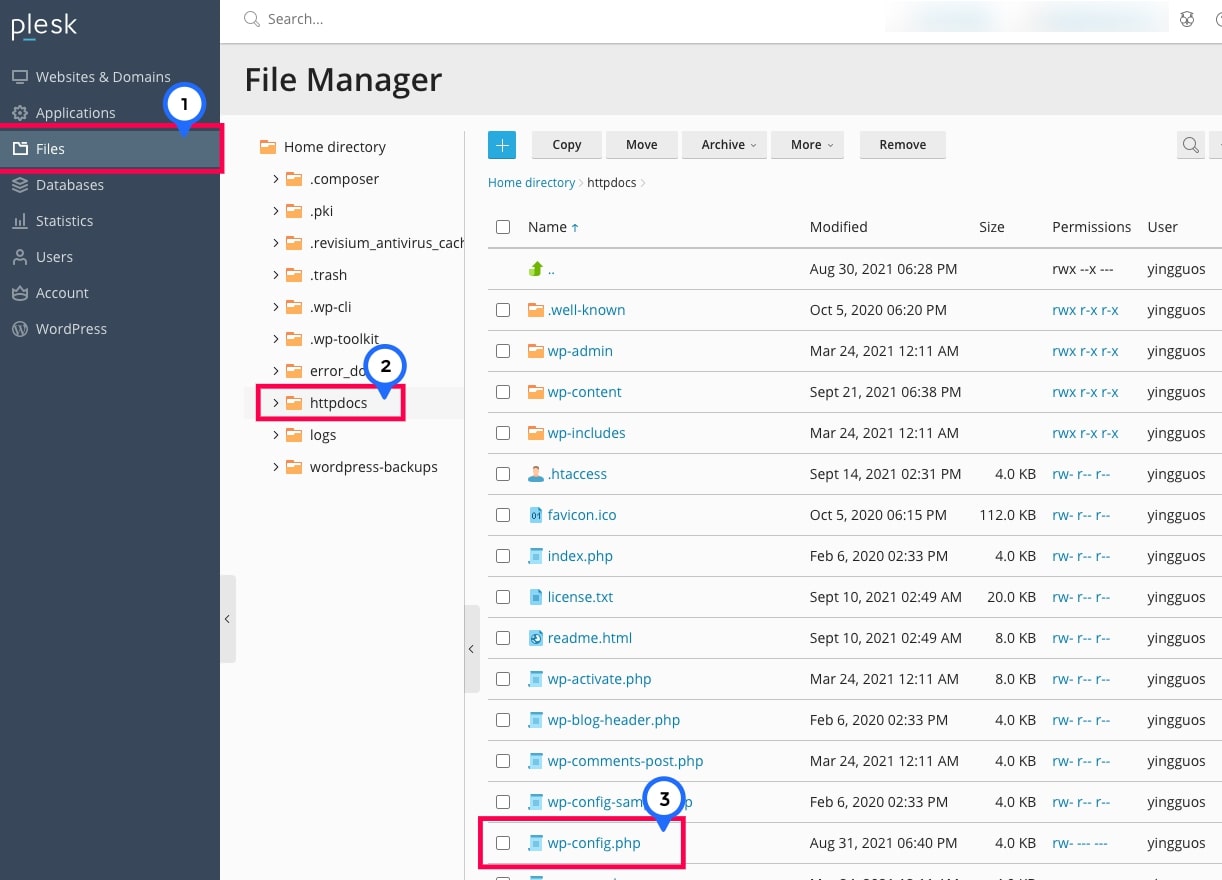
1. Log in to Plesk Control Panel. Click here if you are not sure how to do that.
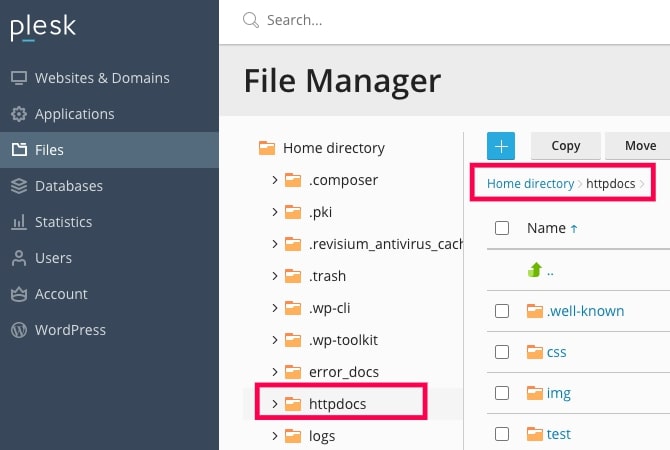
2. Go to “Files” in the left side menu, open the “httpdocs” folder. This is the folder that holds the website files that will be shown at www.your-domain.com.
3. When your hosting account it created, a basic WordPress installation is installed. But as you are installing an existing WordPress site, you can delete all these files.
4. If you are sure, go a head and delete these files, or move the files to a sub-folder.
In the screenshot below, we have moved all the files to a sub-folder called “old_files”
5. Upload your zipped folder for your WordPress website files to the “httpdocs” folder. Select the folder and click “Archive” > “Extract Files” to unzip the folder.
6. After unzipping, if your WordPress files are all in a sub-folder, select all the files and use the “Move” button to move them all the “httpdocs” folder.
Setting Up Your Database
1. Click on the lefthand menu “Databases”

2. You may see an existing database here already. Click the “Add Database” button.
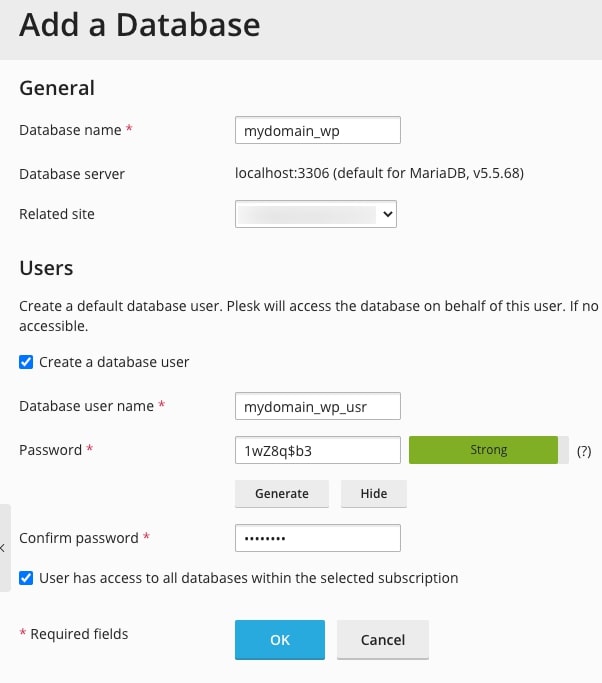
3. Fill in the details:
- Database name: give the database a unique name.
- Related site: select your website from the list.
- Database user name: give the user a unique name.
- Password: click the “Generate” button, and then “Show” button.
- Optional – allow this user to access all databases within the selected subscription.
- Before you click “OK”, make sure you have copied all this information to a text document, we’ll need to use it in a moment.
- Click “OK”
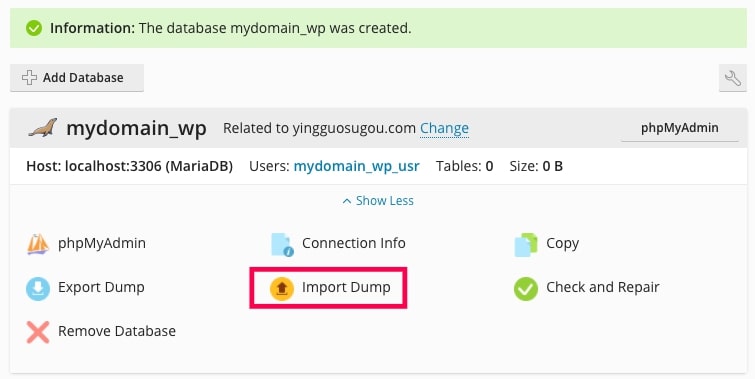
4. Import your database file. After the successful importing of the database, you can double check it by clicking “phpMyAdmin” to view all the database tables.
5. Click “Files” on the lefthand side menu. Go to “httpdocs”. Click on “wp-config.php” to edit the file.
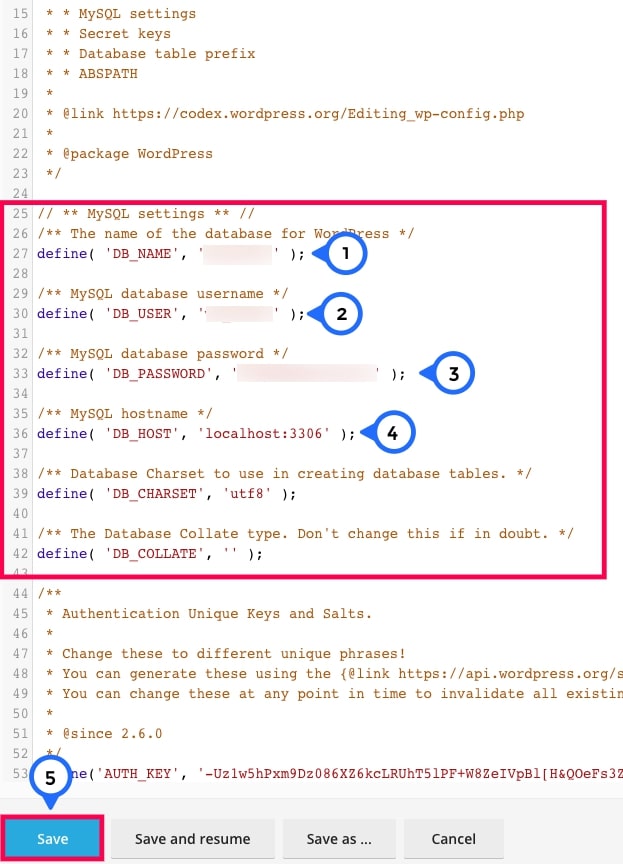
6. In your “wp-config.php” fill in all the database details you copied down from step 3:
- Database Name
- Database User
- Database Password
- Database Hostname should be set to “localhost” or “localhost:3306”
7. Now you should be ready to view your website, visit your domain name to see your migrated site.
Follow Up Steps
Consider taking this follow up actions:
- Attach your WordPress site to WordPress Toolkit
- Secure your WordPress site with WordPress Toolkit
- Install your free Lets Encrypt SSL certificate